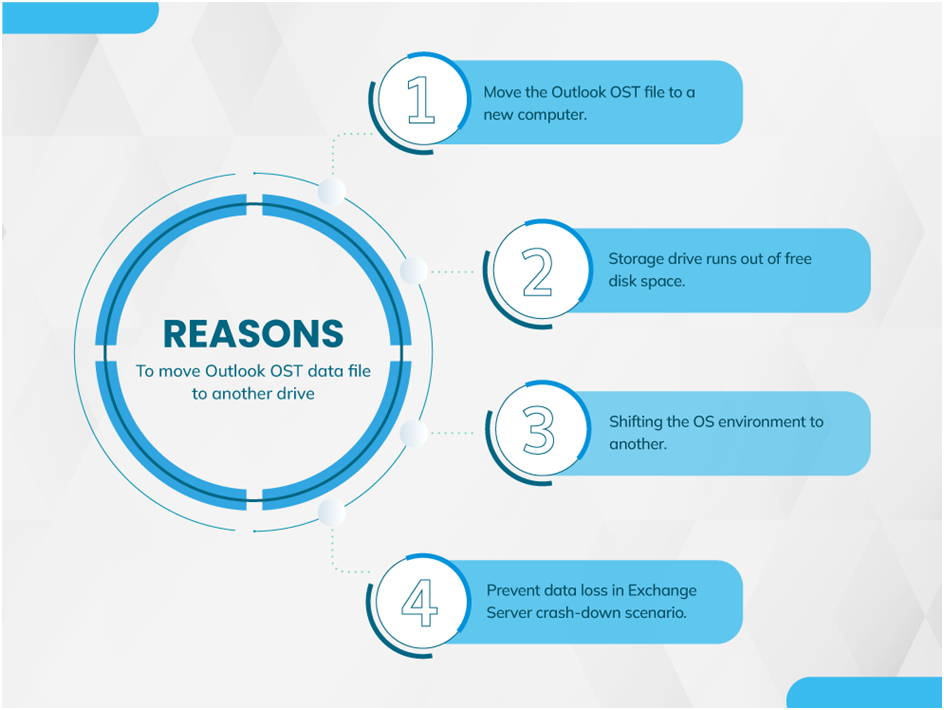
Summary: This write-up is specifically dedicated to providing the best solutions to move OST file to another drive effectively. Moreover, you will find the main reasons that induce this demand along with the default OST file location on the system for different Outlook versions. You can opt for any of the discussed methods to achieve this task.
Microsoft Exchange creates a new updated OST file whenever we configure it. It is the offline Outlook data file that facilitates users to perform changes in messages, calendars, reminders, and other Outlook items. The exchange server will synchronize these changes when internet connectivity is available.

Now, let’s find out the default location of the OST file for different Outlook versions before discussing the best solutions to change the OST file location.
Default Location of Offline Outlook OST File
Outlook Data file (OST) is a local copy of your Exchange Mailbox that allows you to access the mailbox data in offline mode. You can perform any changes regarding appointments, contacts, emails, etc., that will be synchronized on the server when the connection is re-established. You can access the OST file from the default locations that depend on the Outlook and Windows OS versions.
| Different Outlook Versions | Versions of Windows OS | Default Offline Storage File Location |
| MS Outlook 2000/2003/2007 | Windows XP | Local Drive C:\Documents and Settings\User Name\Local Settings\Application Data\Microsoft\Outlook |
| MS Outlook 2010 | Windows XP | My Documents\Outlook Files |
| MS Outlook 2007 | Windows Vista/7/8/10 | Local Drive C:\Users\User Name\AppData\Local\Microsoft\Outlook |
| MS Outlook 2010 | Windows Vista/7/8/10 | Documents\Outlook File\ |
| MS Outlook 2013/2016/2019 | Windows Vista/7/8/10 | Local Drive C:\Users\admin\AppData\Local\Microsoft\Outlook |
Additionally, you can also find the default location of your OST file using Outlook. For this, click on the File menu, then tap on the Account Setting option. Now, select the Account Settings option from the dropdown. Here you need to choose the Data Files option and select the entry. In the end, click on the Open File Location to view the OST file.
After locating the OST file data, now let’s move ahead to the effective ways to move OST file to another drive.
04 Effective Methods to Move Outlook OST File to Another Drive.
In this particular section, we are going to discuss the top 4 methods to change offline Outlook file data to another drive/location. You can perform one of the following methods to change the OST file location.
- Use ForceOSTPath Registry Key to move the Outlook OST file to another location.
- Change Outlook data file location by creating a New Outlook Profile.
- Export OST file to PST using Import and Export Wizard.
- Advanced Approach to Move Outlook OST File to Another Drive
Method-1: Use ForceOSTPath Registry Key to move the Outlook OST file to another location
With the help of the ForceOSTPath registry key, you can easily move the Outlook OST file data to another drive or network storage. Before performing this process, you need to be sure that all the changes stored in the OST file are synchronized with the mailbox.
You can perform the following steps to change the OST file location.
- To start this process, press Windows + R and type regedit, and press the Ok button.
- In the Registry Editor wizard, select the following path depending upon your Outlook version.
For Outlook 2019 and 2016: HKEY_CURRENT_USER\Software\Microsoft\Office\16.0\Outlook
For MS Outlook 2013:
HKEY_CURRENT_USER\Software\Microsoft\Office\15.0\Outlook
For MS Outlook 2010:
HKEY_CURRENT_USER\Software\Microsoft\Office\14.0\Outlook
For MS Outlook 2007:
HKEY_CURRENT_USER\Software\Microsoft\Office\12.0\Outlook
For MS Outlook 2003:
HKEY_CURRENT_USER\Software\Microsoft\Office\11.0\Outlook
- After locating the path, right-click on Outlook, and select the Expandable String Value from the New option.
- Now, right-click on the “New Value #1” and select the Rename option. Provide the Value Name as ForceOSTPath. Again right-click on it and select the Modify option.
- Navigate to the location where you want to move this Offline Outlook data file (OST).
- Then, copy the location path and paste it into the Value Data field of the ForceOSTPath string. Press Ok to save the changes and exit the Registry Editor.
- After restarting your system, launch Microsoft Outlook and configure it with your Exchange Server account.
- Now, it will create the new OST file at the specified location that you have entered in the ForceOSTPath registry key.
Notes: Create a ForcePSTPath registry key in case you are using the IMAP account in MS Outlook 2010 or earlier versions because they used PST fickle for caching the IMAP data.
Method-2: Change Outlook data file location by creating a New Outlook Profile
You can also create a new Outlook profile to move OST file to another drive. With the help of the Control Panel and Mail applet, you can easily change the OST file location. Let us understand this process by following the below steps.
- Open the File Menu in your Outlook Application.
- Then, click on Account Settings. Again select the Account Settings option.
- After that, navigate to the Data Files tab and remove the previously created profile.
- Now, click on the New option and enter the username and password. It will help Outlook to connect to the server.
- Select the Change Account Settings from the Add Account wizard and click on the Next button.
- After this, click on the More Settings that navigate you to the Advanced tab. Select the Outlook Data File Settings here.
- Now, Browse the new location and provide the file name.
- In the end, press Open to create the new .ost file and then restart the Outlook application.
- Now, Microsoft Outlook will use this new file location to create the OST file.
Method-3: Export OST file to PST using Import and Export Wizard
This technique is helpful to move OST file data to a new computer. We know that Offline Data File can only access through the same account that has created them. Also, it is opened on the same system that was used to create that exchange account.
Therefore, it is advisable to convert OST file to PST to back up or move your OST file data.
These are the detailed manual steps to perform the OST to PST conversion to move the Outlook OST data file to another drive.
- Launch Microsoft Outlook and click on the File menu.
- Then, tap on the Open & Export to select the Import/Export option.
- Now, choose the Export to a file option from the Import and Export wizard.
- Here select the Outlook Data File (.pst) and proceed to the next step.
- Specify the mailbox items or folders to export OST to PST format.
- Then, Browse the location where you want to save the resultant PST file and check on the desired options provided in this wizard.
- In the end, click on the Finish button that prompts an option to enter a password to secure the resultant PST file data. Now, press Ok to end the process.
However, there are various professional OST to PST Converters available online that can perform this task more conveniently. This advanced solution also facilitates users to move OST file to another drive.
Method-4: Advanced Approach to Move Outlook OST File to Another Drive
The manual approach to export OST file to PST to change Outlook Data file location has some limitations. Due to these limitations, data integrity is at high risk. Therefore, experts have recommended opting for a reliable utility to move the offline Outlook data file. In this regard, you can opt for one of the Best OST to PST Converter to ensure high data integrity throughout the conversion of your OST file to PST format.
Following are some of the advanced features that make it an authentic and reliable utility.
- Users can quickly move their offline OST file data to different email clients, including Gmail, Yahoo Mail, Thunderbird, Office 365, etc.
- You can also convert Outlook OST to PST, PDF, MBOX, EML, DOC, and other file formats to access the data in different applications.
- It consists of multiple advanced features like Mail and Task Filter, Removes Duplicate Mail, Custom Folder Name, etc.
- You can easily perform the backup and migration process of the multiple OST files in a single run.
- Moreover, it also allows you to Split the Resultant PST file into smaller ones.
This utility will help you to maintain the authenticity of your OST file. Additionally, it facilitates you to move Outlook OST to another drive by converting them into PST or another desired format.
Conclusion
This article is specifically dedicated to providing the best solutions on how to move OST file to another drive/location. Now, you can accomplish this task with the help of different methods explained in this article. Additionally, this informative write-up also discussed the advanced features of an advanced OST to PST Converter. This professional software approach is more reliable to move Outlook OST data file to another drive.
Author Bio:
Dhruv Sharma is a tech-savvy writer, with a keen interest in creating content for technology websites. As a technical content writer, he often writes about Data Migration, Backup & Recovery, and other similar topics. Dhruv spends most of his time researching and writing about creativity, technology, and digital marketing trends.


