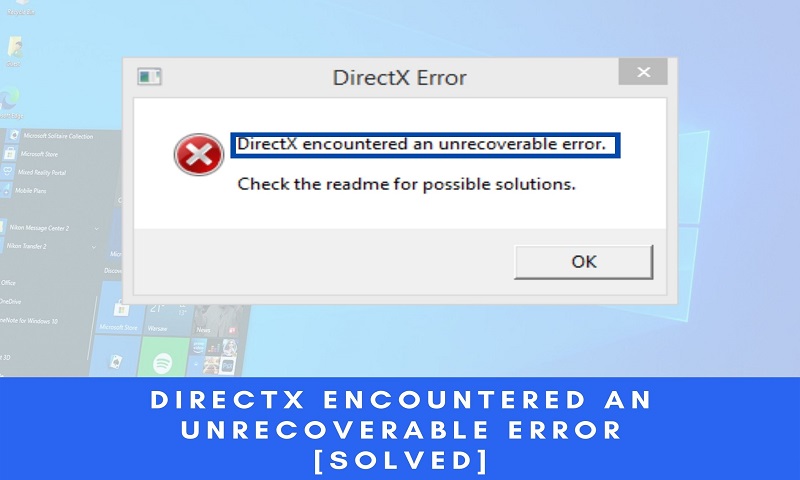
Are you facing difficulties while launching your games because your computer is showing the “DirectX encountered an unrecoverable error”? If yes, try these different solutions shown in this article.
DirectX makes it easy for your computer to do things like make videos, edit photos, and do many other things that involve multimedia. It also helps you play high-end games and allows you to do heavy graphics tasks more efficiently. However, due to different reasons, the system might show you an error while launching an application, which requires DirectX to function.
This error is very common, but you can easily fix the same by using the tried and tested solutions we mentioned in this post. When you deploy the fixes like Update display driver, you can get rid of this error readily and run different games and apps perfectly. So without wasting any time, let’s start with the fixes.
How To Fix DirectX Full-Screen Error In Windows Device?
It is very frustrating to see the DirectX full-screen error stating “DirectX encountered an unrecoverable error” while starting a game. And if you are facing the same issue, then don’t worry we are here to help you. Read and try the different solutions mentioned below to get rid of this issue.
Check For The System Requirements
If your device does not match the minimum requirements to play any game, you may face issues including the DirectX full-screen error. So the first thing you should do is to check the system requirements for the game. Generally, this fix works if you want to play high graphics games such as Call of duty, Grand Theft Auto, Elex, Destiny, etc.
The developers of different games provide minimum as well as recommended system requirements to run the game. You should ensure that your system meets the recommended requirements to run the game. Minimum requirements are sufficient to run the game however, you may face different problems like glitches and lags.
Update or Reinstall Your Graphics Driver
If your device meets all the system requirements and still you are facing this issue, you can try to fix the problem yourself. Here’s the next thing you should do; make sure that the display driver you’re using should always be up-to-date.
Most of the time, when you update your OS it should automatically update all of your drivers. If the update process got hindered due to any error some of the drivers might not get updates. But don’t worry you can always update these drivers on your own because Windows has some in-built tools that will help you out.
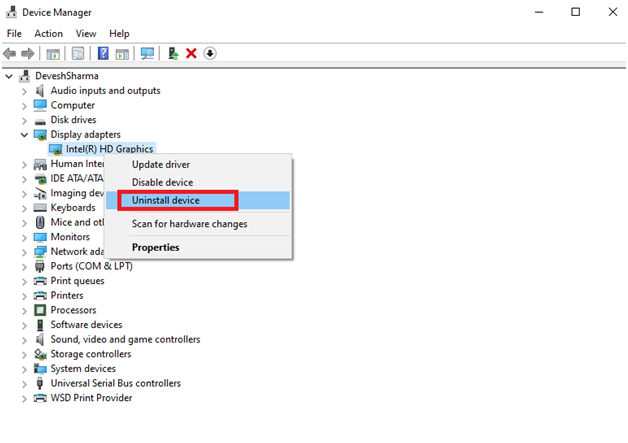
Follow the steps below to update your audio driver using Device Manager:
- Right-click on the Start button and select Device Manager from the list
- On the Device Manager window, click on the arrow to expand the Display adapters
- Right-click on your Graphics driver and then click on Update driver
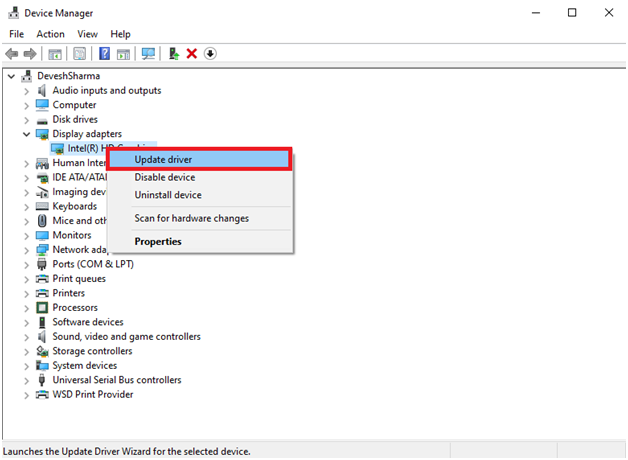
- A pop-up window will appear, select “Search automatically for drivers” over there
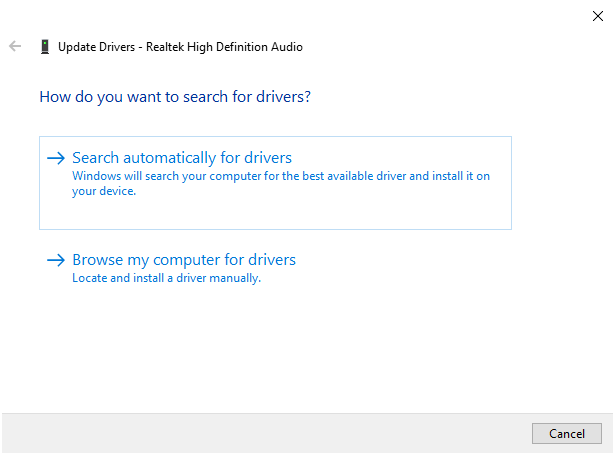
Wait for your computer to see if there is a new audio driver for your device that it can use. If there are, then follow the instructions on the screen to make sure they are set up correctly. When your Windows device the installation process is done, Restart your device and check to see if the problem has been fixed.
If you want to keep your Windows drivers updated, we recommend you download driver updater software. These applications will help you keep your drivers up-to-date, some of these applications also keep a backup of your old drivers in case you need them, and they improve your computer’s overall performance.
Here are some of the best driver updater software for your Windows device:
Follow the steps below to reinstall the audio driver using Device Manager:
- Follow the steps mentioned above to open Device Manager and expand the Display Adapters device category.
- Right-click on the Graphics driver that you are using and select Uninstall driver
- Click on the Uninstall button to confirm your actions, on the pop-up window
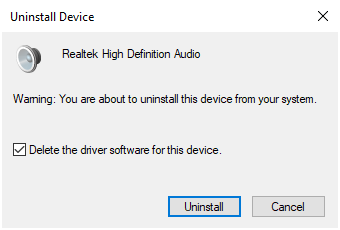
- After the uninstallation process is complete, Restart your computer
When you restart your computer, it will download new drivers for you. It might take a few minutes, depending on how fast your internet is. It’s time to check to see if you got rid of the DirectX error. If not, move on to the next idea.
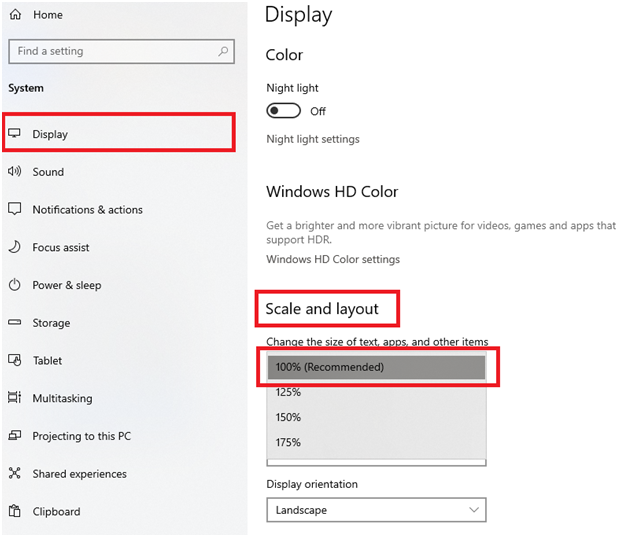
Change The Display Scaling Settings
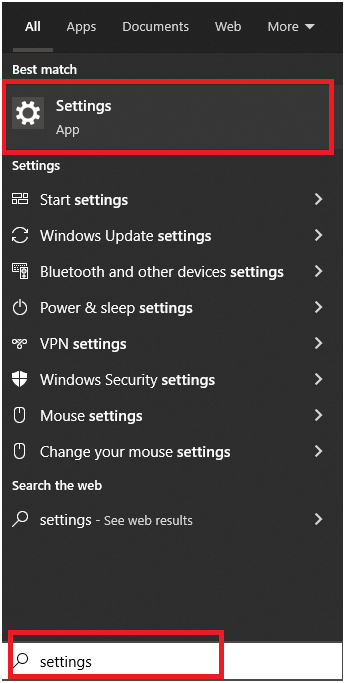
To get rid of the DirectX full-screen error you can change the Display Scaling Settings on your Windows Device. Follow the instructions mentioned below to solve this problem:
- Search Settings in the taskbar and press Enter
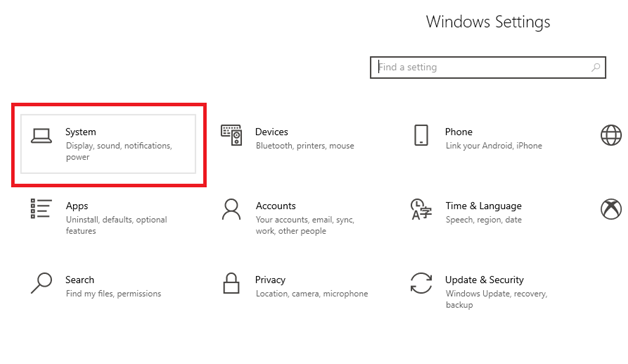
- Click on the System in the Settings window
- Click on the Display option on the left-side panel. Ensure that the Scale and Layout should be 100%, you can change it by clicking on the dropdown menu.
Now, Windows will automatically apply the changes and adjust all of your applications accordingly. Launch any game again and check whether the issue is resolved or not.
DirectX Full-Screen Error: Solved
We hope this write-up helped you solve the DirectX full-screen error called “DirectX encountered an unrecoverable error” on your Windows device. You should always try these solutions, in the same manner, they are presented. If your issue is still not resolved, you should reinstall or upgrade your DirectX software. If you liked this article or if you have any suggestions, please write them down in the comments box.
Guest Post Service By www.guestarticlehouse.com