

Many of us prefer to store photos on the computer rather than on mobile phones, SD cards, pen drives, or portable SSDs. Computers make photo editing and transferring easier. You cannot perform many advanced photo editing techniques on smartphone apps. Besides, mobile apps cannot produce the same crisp results as capable desktop software.
If you accidentally deleted some important photos, you’d better act quickly and find a good solution to get them back. In this article, we will introduce a few methods for you how to recover deleted photos on Windows or Mac step by step. Related: Best Photo Recovery Software for Mac (Free & Safe)
Part I. How to recover deleted photos on a PC – No software needed
Get back deleted photos from Windows Recycle Bin
Your photos and other files will go to the Recycle Bin on the Windows computer, whether you press the Delete key or right-click and then select “Delete.” If you can see the temporarily deleted photo files in the Recycle Bin, recovering them is easy:
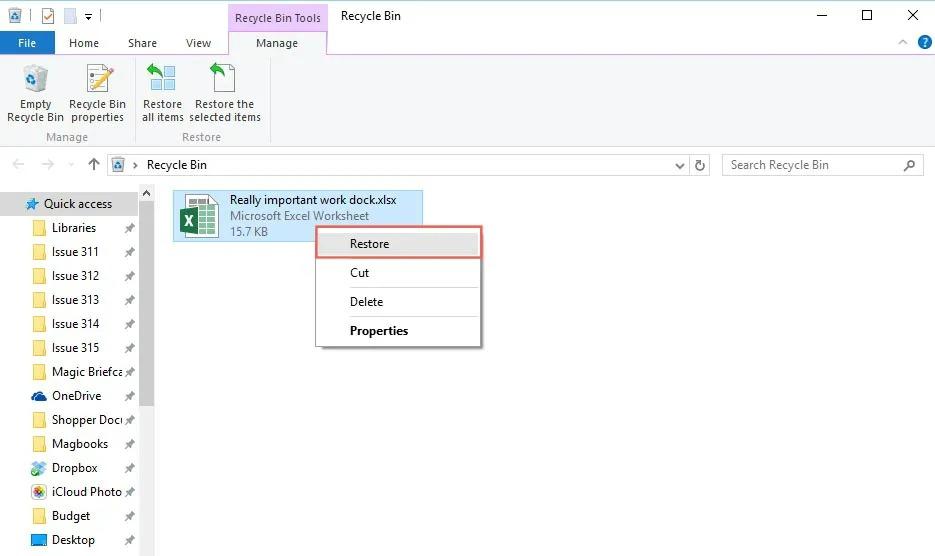
Step 1. On your computer desktop, double-click the Recycle Bin icon to open it.
Step 2. Find the deleted photo or other document you need, right-click on that file, and select the Restore option (below is an example).
In some conditions, your photos would not be stored in the Recycle Bin after they are deleted.
- You manually emptied the Recycle Bin, and as a result, all items in it are gone.
- Some photos are permanently deleted because you used the Shift + Delete keys.
- You did not delete the photos from the computer but from cameras, portable SSDs, or pen drives.
- An unanticipated power outage, virus attack, or software crash occurred when you were editing a photo on the computer.
2. Recover permanently deleted photos from Windows backups [Two Solutions]
If your photos get permanently deleted, you cannot see them in the Recycle Bin, but the following two solutions will help you..
Solution 1. Use File History to recover deleted photos (Applicable on Windows 8/8.1/10)
Users of Windows 8, Windows 8.1, and Windows 10 can back up their data with File History and later retrieve a specific copy of a file from earlier backups. If you have already backed up the photos using File History to an external device, such as a USB flash drive or portable SSD, please do so. First, connect the backup storage media to the PC, and then follow the steps to recover the deleted photos:
- In the search box on the Windows taskbar, enter “Restore files”, and then select Restore your files with File History to view all the backup collections stored by File History.
- Carefully check out the backup files and find the photos you need; you can use the arrows to see all versions of each file.
- When you find a specific version you want, select “Restore” to save the photo to its original location immediately.

Solution 2. Use Backup and Restore to recover deleted photos (Applicable on Windows 7)
On older versions of the Windows 7 operating system, you can only use the Backup and Restore feature to protect your files from data loss risk.
- On the Windows 7 computer, open the “Start” menu, select “Control Panel” in Windows System, and then select “Backup and Restore”.
- When asked to set up a backup, you may not have backups in Windows yet. If you enabled the backup feature earlier and have backed up your important photos, hit “Restore my files” and follow the on-screen instructions to recover the deleted photos.
Part II. How to recover deleted photos on macOS – No software is required
- It’s simple to recover deleted photos from Trash Bin on Mac
The Move to Trash option helps you delete a file on Mac laptops and desktops, but you sometimes cannot locate the deleted photos in the Trash, for example:
- On a Mac, all objects are removed from the trash.
- You select “Delete instantly” to take the pictures out of the trash.
- Instead of pressing Command + Delete to delete the picture, you simultaneously pressed Option + Command + Delete.
- When the setting “Remove objects from the trash after 30 days” was turned on, and your deleted images had been remaining in the Trash for more than 30 days, you may have had this issue.
You can easily recover deleted photos on a Mac if you can see them in the Trash.
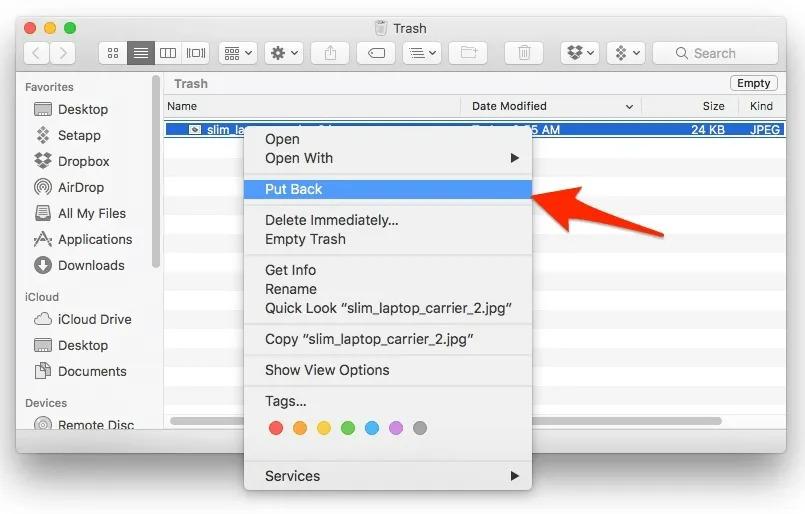
1) In Mac’s dock, click on the Trash icon.
2) Go and find the files you deleted, right-click each photo, select “Put Back,” and the photo will soon be restored to its original location.
2. How can I restore deleted photos from Time Machine backups
Time Machine is an excellent Mac built-in backup option for people to regularly back up their documents and system files to a storage device or external SSD. If Time Machine is set up beforehand, you have a chance to restore your deleted photos.
1) First, connect your Time Machine backup drive (the USB flash drive, external hard drive) to your Mac
2) Open the folder from which you deleted photos.
3) Select “Enter Time Machine” after clicking the Time Machine icon in the menu bar.
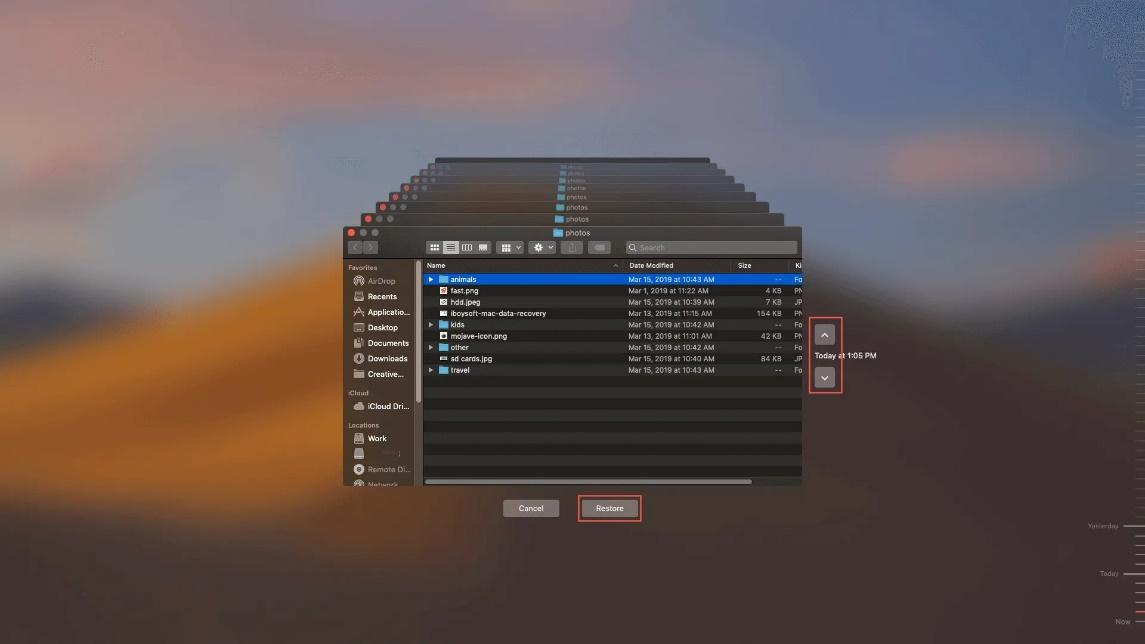
4) Carefully examine the things in the backup folder using the up/down arrows to locate older versions of the files. You may view numerous snapshots of the entire folder and how it evolves.
5) Double-click a photo to see a preview of the content. Click “Restore” if you need to recover that particular file.
Part III. Use photo recovery software to recover your deleted photos
You can utilize expert file recovery software to recover deleted files if you can’t find the necessary photos in the Trash and didn’t make a local backup or cloud backup.
We find iBoysoft Data Recovery to be a good-to-use photo recovery program that can deeply scan your disk and retrieve lost or deleted photos, PDFs, videos, PSD documents, and other files. Besides, you can use it to perform external SSD data recovery, SD card recovery, USB flash drive data recovery, RAW drive recovery, etc. The built-in file previewer in iBoysoft program allows you to view the files you deleted and decide if you want to recover them.
iBoysoft Data Recovery has both a Windows and Mac version for different users to recover deleted photos on their computers. Download the program and go through the following steps:
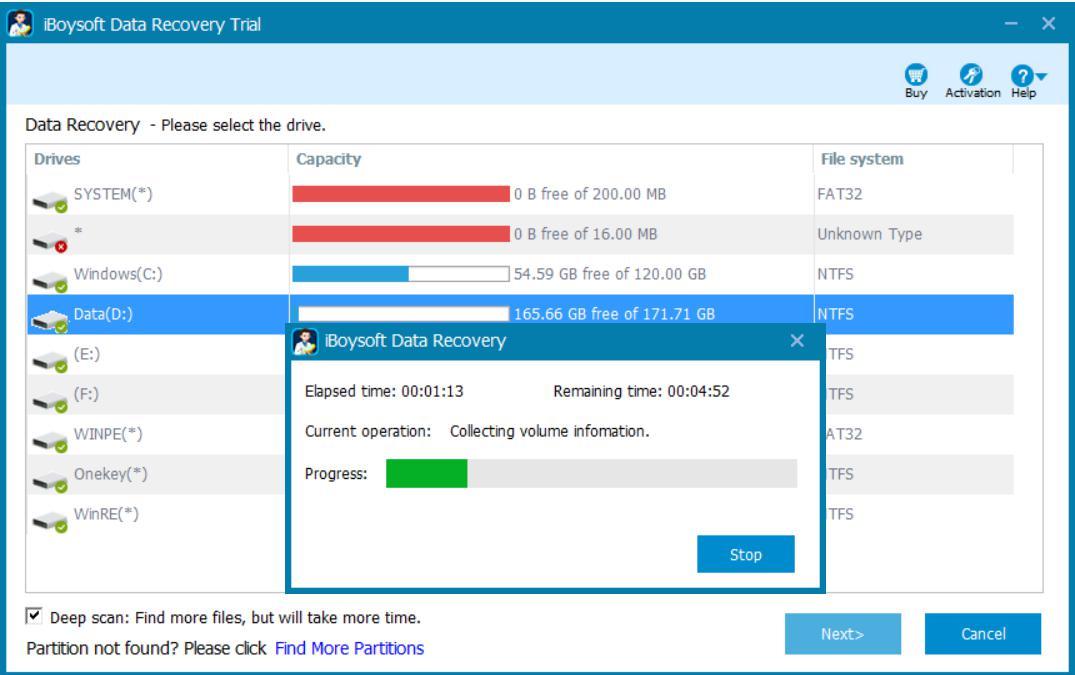
Step 1. Install the program on the computer; in my case, I used the Windows version. Then select the drive from which you wrongly deleted some photos.
Step 2. Click the blue “Next” button, iBoysoft Data Recovery will start scanning the selected drive and then list photos that got lost. (Optionally, you can give a tick mark to the “Deep scan” option to find more files in this step.)
Step 3. After the scanning is complete, you may check the scanning results, preview the files that can be recovered, select the files you need, and then click “Recover.”